Scalp Tattoo for Baldness: Your Ultimate Guide to Micropigmentation
If you're exploring solutions for baldness, you've likely come across the term scalp micropigmentation (SMP), often called a hair or scalp tattoo. This isn't just another hair loss treatment; it's a highly sophisticated cosmetic procedure that cleverly creates the illusion of a full head of hair.
It's a non-surgical approach where a skilled practitioner deposits tiny, layered dots of pigment onto your scalp. The final result? An incredibly realistic, low-maintenance look that perfectly mimics natural hair follicles.
Unpacking the Art of the Scalp Tattoo
Let's clear up what a scalp tattoo for baldness really is. First, set aside any preconceived notions you have about traditional body art. SMP is a completely different ball game, blending meticulous technical precision with a true artist's touch. We're not drawing pictures here; we're solving the problem of hair loss by building up layers of thousands of tiny impressions.
Think of it like pointillism, the painting technique where artists use countless individual dots to create a complete image. An experienced SMP artist does something very similar, strategically placing micro-dots of pigment into the upper layer of the scalp's skin.
This technique is designed to achieve one of two key results:
- The Buzz Cut Look: This is perfect for anyone with significant balding or a receding hairline. SMP masterfully replicates the look of a full head of hair that has been deliberately shaved short.
- Added Density: For both men and women who are dealing with thinning hair, these pigment dots work wonders by reducing the stark contrast between the hair and the scalp. This simple change makes existing hair appear substantially thicker and fuller.
Ultimately, it’s a powerful cosmetic solution that restores the look of a natural hairline and brings back confidence, all without a single incision.
How SMP Differs From a Regular Tattoo
While people often call it a "hair tattoo," that comparison is really only skin deep. The tools, pigments, and techniques are all specifically designed for the unique canvas of the scalp to ensure the result looks natural and stands the test of time.
One of the biggest differences is how deep the pigment goes. A regular tattoo needle pushes ink far down into the dermal layer of your skin. SMP is much more delicate. The needle only just reaches the very top of the dermis. This shallower depth is absolutely critical—it stops the pigment from spreading or "bleeding" over the years, making sure each dot stays crisp and defined, just like a real hair follicle.
Scalp Micropigmentation is a specialised field requiring unique training. An artist must understand not just the mechanics of tattooing but also hair growth patterns, skin tones, and the principles of creating a natural, age-appropriate hairline.
The Specialised Tools of the Trade
The equipment used for a scalp tattoo is also highly specialised. The microneedles are significantly finer than those used for body art, which allows the artist to create incredibly small dots that are a perfect match for the size of your hair follicles.
The pigments are another crucial point of difference. Standard tattoo inks are a cocktail of compounds and colours that can degrade over time, sometimes turning an unwanted shade of blue or green. SMP pigments, on the other hand, are typically carbon-based and formulated to hold their true colour. They are designed to fade gracefully over many years without changing hue, which makes future touch-ups simple and seamless as you age.
The practitioner will often assess the extent of your hair loss using the Norwood scale to map out the treatment area and plan the number of sessions required. If you're curious about your own hair loss pattern, you can learn more about what is the Norwood scale in our detailed guide.
How SMP Creates a Realistic Illusion of Hair
The real magic behind a scalp tattoo for baldness is where artistry meets a bit of science. It’s so much more than just putting ink on a bald head; a talented practitioner meticulously builds a hyper-realistic illusion of hair follicles, one tiny dot at a time.
This isn’t your typical tattoo. We're not drawing lines or shading in blocks of colour. Instead, technicians use highly specialised microneedles to place thousands of tiny pigment deposits into the upper layer of the skin. A great way to think of it is like the art technique of pointillism, where a collection of individual dots comes together to create a full, textured image.
Layering for Depth and Dimension
You don’t just walk out with a finished look after one appointment. The whole illusion is built up gradually over two to four sessions, and this layering is what makes it look so convincing.
- Varying Shades: A good artist never uses just one flat colour. They’ll custom-blend several shades of pigment to match the subtle tonal variations you see in a real head of hair.
- Building Density: With each session, more layers of these tiny dots are added. This creates a cumulative effect, giving the impression of genuine density and three-dimensional fullness.
- Controlled Fading: The entire process is planned around how your skin will heal and how the pigment will settle. The goal is a soft, natural finish—not something harsh or fake-looking.
It’s this methodical layering that fools the eye, replicating the complex appearance of real hair growth and avoiding that flat, "stamped-on" look that everyone wants to avoid.
The Science of Specialised Pigments
The pigment used in SMP is a world away from standard tattoo ink, and this is crucial for the treatment's success and longevity. We use advanced, carbon-based pigments that are specifically designed for the scalp.
These pigments are engineered to be incredibly stable. They're formulated to hold their true colour over time, which prevents that dreaded blue or green tinge you can sometimes see with old, traditional tattoos. The right pigment is carefully chosen and often custom-mixed for every single client.
Getting a natural result really comes down to the practitioner’s skill in picking the perfect pigment to complement your skin and any remaining hair. This is why a deep understanding of skin undertone is non-negotiable for any good artist—it’s key to ensuring the colour stays true for years.
The Artistry of the Natural Hairline
At the end of the day, the success of the whole treatment hangs on creating a soft, believable hairline. A bad hairline—one that's too sharp or too low—is the biggest giveaway of an SMP job.
A truly skilled technician will carefully consider a few things:
- Facial Structure: The hairline isn't a one-size-fits-all template. It's designed to suit your unique facial features, head shape, and even your age.
- Soft Edges: A real hairline isn't a hard, straight line. A great artist creates a slightly broken or feathered edge to perfectly mimic the way natural hair grows.
- Client Collaboration: This is a partnership. You and the practitioner will work together to draw on and agree on a hairline that you're completely happy and confident with.
This painstaking attention to detail is what makes the final result so incredibly convincing. When it's done right, the scalp tattoo blends seamlessly with any hair you have and is practically undetectable. You can see just how amazing the transformations can be in our gallery of scalp micropigmentation before and after photos.
Your Scalp Micropigmentation Journey Step by Step
Thinking about a hair tattoo is one thing, but knowing what the process actually involves is another. It’s not a one-and-done deal. Instead, it’s a carefully planned journey spread over several weeks, a true partnership between you and your practitioner to get the look just right.
Each session builds on the last, adding layer upon layer of pigment to create a genuinely believable illusion of hair density. Let’s walk through what you can expect at every stage.
This meticulous layering is the secret to achieving that realistic, three-dimensional effect that makes high-quality SMP so effective.
Stage One: The Initial Consultation
Your journey doesn't start with a needle; it starts with a chat. Honestly, this first consultation might be the most crucial part of the whole process. It’s where the groundwork is laid for everything that follows. A good practitioner will sit down with you, properly assess your hair loss (often using the Norwood scale to get a clinical read on things), and really listen.
This is your time to talk about what you’re hoping to achieve. Are you after a super-sharp, defined hairline or something softer and more natural? Maybe you want to rock a full buzz-cut look, or perhaps you just need to add some density to thinning patches.
A great practitioner is part technician, part artist. They'll take your ideas on board and then blend them with their own expertise to design a hairline that not only looks great but actually suits your face shape, age, and style.
You’ll work together, drawing a potential hairline right onto your scalp with a wax pencil. This is a brilliant step because it means no guesswork. You get to see and agree on the final look before any pigment ever touches your skin. It’s also the perfect time to clear up any lingering questions you have about the cost, the procedure itself, or what to do afterwards.
Stage Two: The Treatment Sessions
The real work happens over two to four separate sessions. Each one usually takes between two and four hours. We deliberately space these appointments a few weeks apart—it’s absolutely essential for getting a hyper-realistic result.
This patient approach gives the pigment from the previous session time to settle into the skin and for any redness to fade. It means your artist has a clear canvas to work on each time, adding density and detail with precision.
So, what should you expect when you’re in the chair?
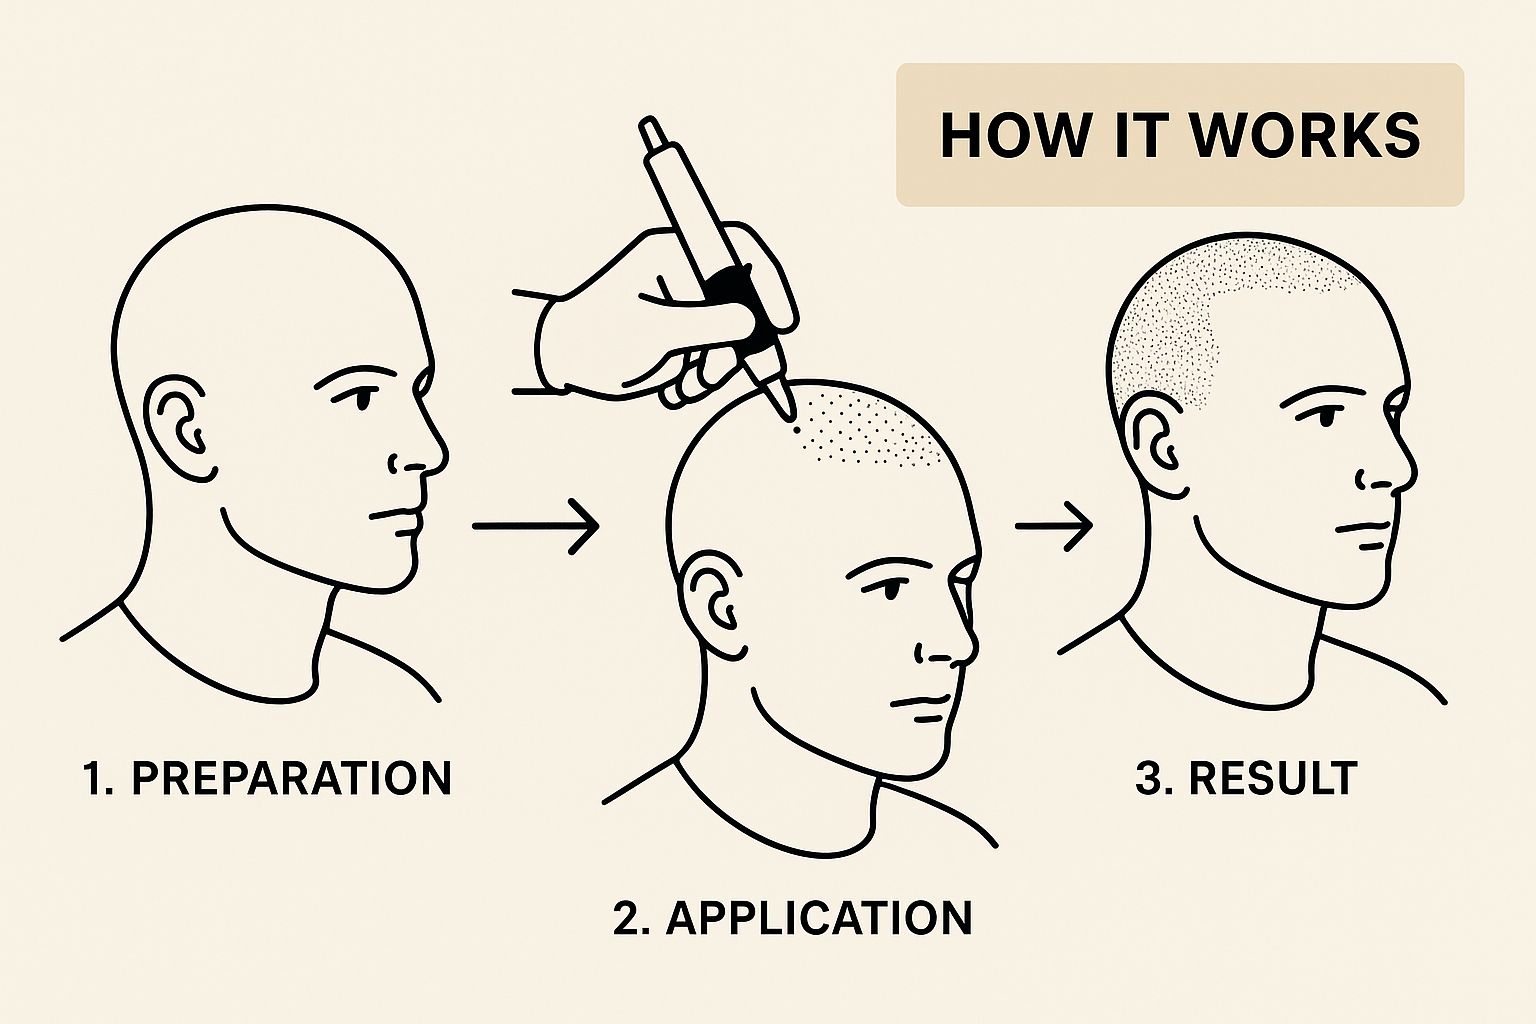
- Prep Work: Your scalp gets a thorough clean. If you're going for the shaved-head look, your practitioner will clip any existing hair right down to create a perfectly even surface.
- Numbing Cream: Comfort is key. A topical numbing cream is applied to the area to take the edge off. Most people say the sensation is pretty minor, maybe a 2 or 3 out of 10 on the pain scale.
- Applying the Pigment: This is where the artistry begins. Using specialised microneedles, the practitioner meticulously applies thousands of tiny pigment dots. They deposit the pigment at the exact right depth in the skin to perfectly mimic the look of a real hair follicle.
Every session adds a new layer of "follicles," gradually building up the colour and creating the illusion of fullness. It’s this layering that creates the subtle, 3D effect that tricks the eye so convincingly.
The whole SMP process is a structured, multi-stage treatment designed for the best possible outcome. Here’s a quick overview of what to expect from your first phone call to seeing the final, finished result.
Scalp Micropigmentation Treatment Timeline
| Stage | What Happens | Typical Duration |
|---|---|---|
| Initial Consultation | You'll meet your practitioner, discuss your goals, assess your hair loss, and design your new hairline together. | 30 - 60 minutes |
| Session 1 | The foundation is laid. The first layer of pigment dots is applied, and the hairline shape is established. | 2 - 4 hours |
| Healing Period 1 | Your scalp heals, and the pigment settles. You'll follow specific aftercare instructions. | 10 - 14 days |
| Session 2 | A second, denser layer of pigment is added to build colour and create a fuller look. The practitioner refines the work from the first session. | 2 - 4 hours |
| Healing Period 2 | More healing time. The pigment will continue to settle into its final shade. | 10 - 14 days |
| Session 3 (and 4, if needed) | This is the "perfection session." The practitioner adds the final details, perfects the blend, and ensures the result is seamless and natural. | 2 - 3 hours |
| Final Result | After the final session has fully healed, your SMP treatment is complete and ready to show off. | Visible after final healing |
This timeline ensures that each layer has time to heal properly, which is absolutely critical for a realistic and long-lasting hair tattoo.
Stage Three: Healing and Final Results
Your scalp will be a bit red right after each session, but don't worry—that usually disappears within 24-48 hours. The pigment dots will also look a little darker and bigger at first. They'll shrink and soften to their intended size and shade as the skin heals. Sticking to the aftercare plan your clinic gives you is non-negotiable for getting the best result.
The last session is all about the finishing touches. Your practitioner will perfect the hairline, blend any tricky spots, and add those final details that pull the whole look together. Once that last session is done and your scalp has healed up, you’re good to go.
Being well-prepared can make a huge difference in how smoothly everything goes. For more tips, check out our guide on how to prepare for Scalp Micropigmentation treatment.
Is a Scalp Tattoo the Right Solution for You?
Deciding on a scalp tattoo for baldness is a big move. While it's an incredible solution for many people I've worked with, it’s certainly not a one-size-fits-all fix. The key is to really understand your own hair loss situation and what you hope to get out of it. The best results always happen when the treatment is a perfect match for the person.
This treatment really comes into its own for specific types of hair loss. For instance, if you're dealing with male pattern baldness and you're happy to rock a sharp, clean buzz cut, then SMP is probably exactly what you're looking for. It does an amazing job of recreating the look of thousands of tiny hair follicles, bringing back your hairline and framing your face.
Ideal Candidates for Scalp Micropigmentation
But it's not just for the classic buzz-cut look. SMP is surprisingly versatile and can tackle a range of hair loss scenarios, making it a solid option for both men and women.
See if any of these situations sound familiar:
- You have thinning hair: If your hair is starting to look a bit sparse but you still have reasonable coverage, SMP can make a world of difference. The pigment darkens the scalp, which cuts down the contrast between your skin and hair. This creates a really convincing illusion of more density and fullness.
- You need to camouflage scars: Scars on the scalp, whether from an old injury or a hair transplant surgery (especially those FUT strip scars), can be quite prominent. SMP is brilliant for this. We can carefully deposit pigment into the scar tissue to help it blend seamlessly with the surrounding ‘hair’.
- You're a woman with diffuse thinning: Women often experience hair loss differently, where it thins out all over rather than just at the hairline. SMP adds a subtle shadow to the scalp, making partings look tighter and the hair much fuller overall.
- You live with alopecia areata: For anyone with patchy hair loss from alopecia, we can use SMP to fill in those bald areas, creating a consistent and even appearance across the whole scalp.
Remember, SMP is a cosmetic illusion. It’s not a hair growth treatment and it won’t stop you from losing more hair. Its real power lies in its ability to masterfully conceal the effects of hair loss, putting you back in control of your look.
When a Scalp Tattoo Might Not Be the Best Choice
Just as it’s important to know who SMP is for, it’s equally crucial to understand when it might not be the right move. Certain skin conditions can get in the way of the healing process or affect the final look, making it a less-than-ideal option.
You should definitely have a detailed chat with a specialist before proceeding if you have:
- Active scalp conditions: If you're dealing with severe psoriasis, dermatitis, or even bad acne on your scalp, the skin needs to be completely calm and healed before we can start. Trying to apply pigment to inflamed or flaky skin just won't work and will lead to a poor result.
- A history of keloid scarring: People who are prone to developing keloids—those thick, raised scars—are usually not good candidates for SMP. The tiny needle pricks required for the treatment could potentially trigger keloid formation on the scalp, which is a risk we want to avoid.
Ultimately, making the right call comes down to weighing the cosmetic benefits against an honest look at your personal health and circumstances. The best first step is always a thorough consultation with a qualified practitioner to figure out if a scalp tattoo for baldness is truly the right path for you.
Aftercare and Long-Term Maintenance of Your SMP
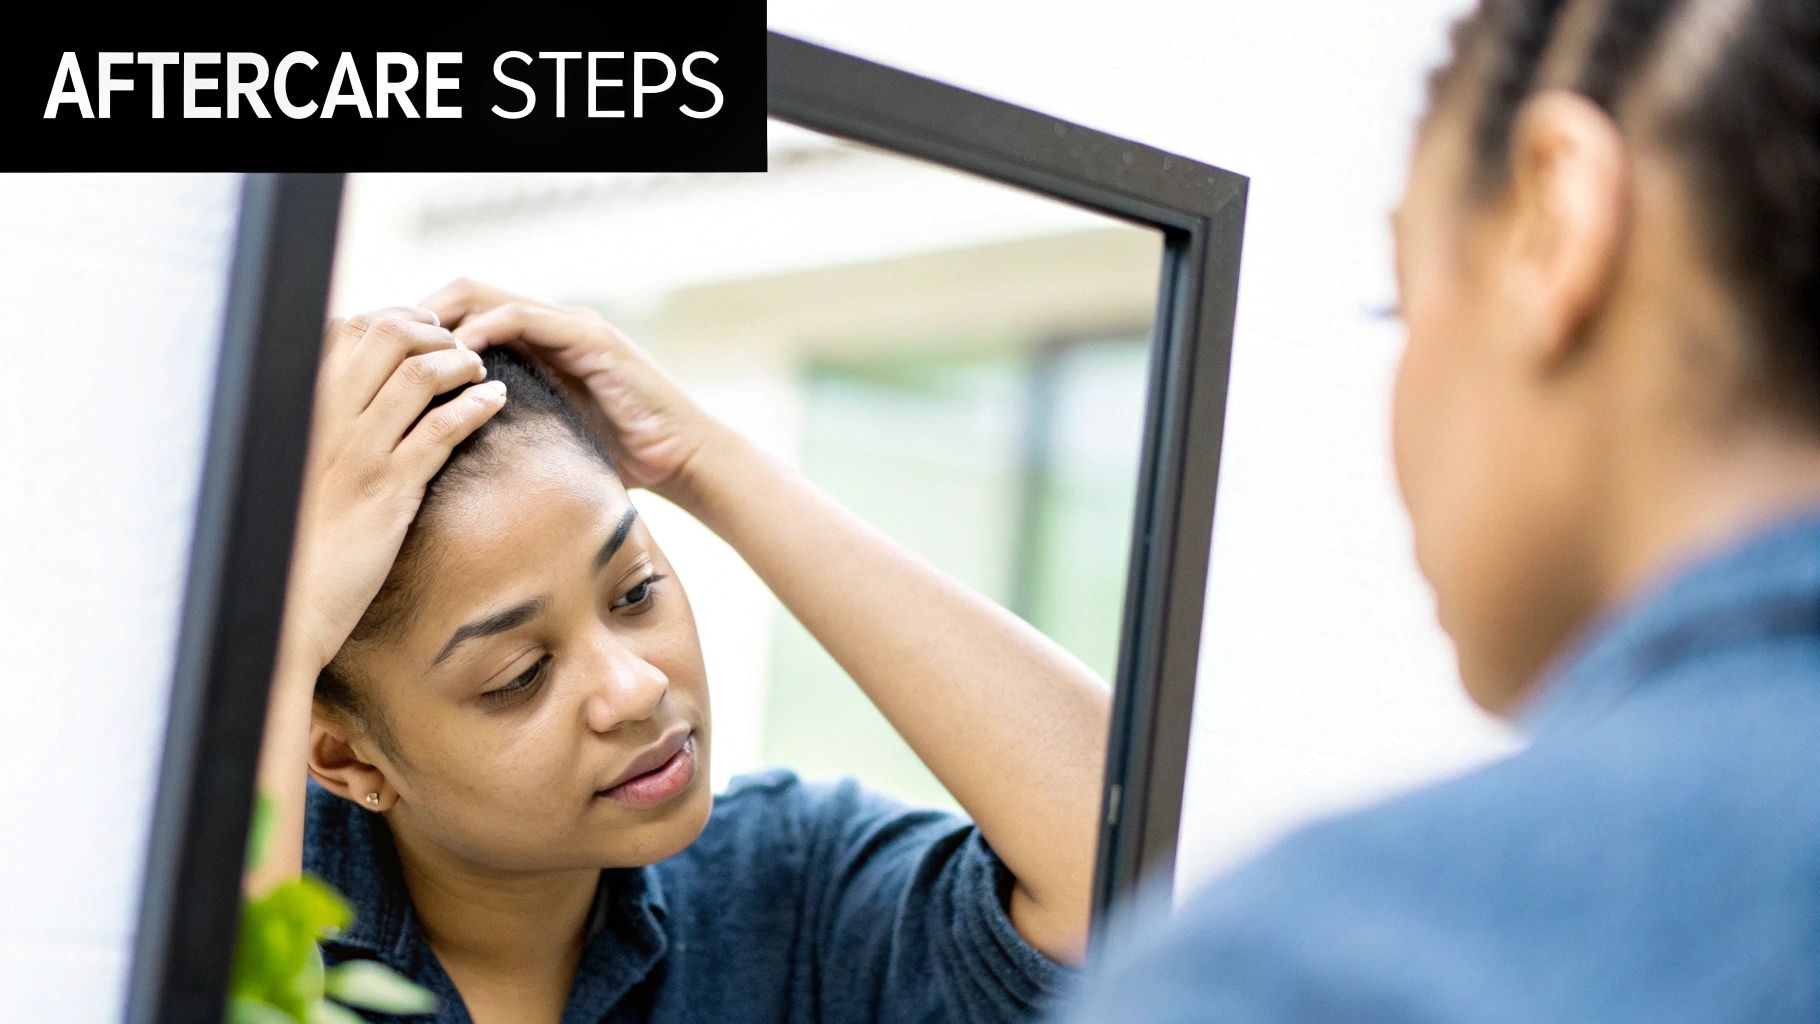
Getting a scalp tattoo for baldness is a big step towards boosting your confidence, so you'll want to protect that investment. Good aftercare is the key, especially in the first week, as it dictates how well the pigment settles and how long it lasts.
Your practitioner will give you a list of dos and don'ts—think of them as your bible for the first few days. Following their advice to the letter is what sets you up for a fantastic, long-lasting result.
The Critical First Week of Healing
Right after a session, the name of the game is protection. Your scalp is healing, and the fresh pigment needs to be left completely alone to settle in properly. This just means being a little more careful with your daily routine for a short while.
For the first four to five days, these rules are non-negotiable:
- Keep it Dry: Don't wash or even get your scalp wet. When you shower, be careful to keep water and shampoo away from the treated area.
- No Heavy Sweating: This is your free pass to skip the gym. Avoid intense workouts, saunas, or anything that makes you sweat heavily, as moisture can disrupt the healing pigment.
- Shun the Sun: Fresh pigment and direct sunlight are not friends. If you have to be outside, a loose-fitting hat is a must, but try to avoid sun exposure altogether.
Sticking to these steps allows the tiny scabs over each impression to heal and fall away naturally, locking the colour in place. For a more detailed look into this process, check out these 5 top tips to care for your scalp after SMP.
Your Long-Term SMP Care Routine
Once you’re past that initial healing phase (usually about a week), looking after your SMP becomes incredibly simple. It really just boils down to two main things: sun protection and moisturising.
Think of your SMP like any other high-quality tattoo. You wouldn't let a new sleeve fade in the sun, and the same principle applies here. UV protection is crucial to keeping the colour and definition looking sharp.
Sun exposure is, without a doubt, the biggest enemy of your SMP. Over time, UV rays break down the pigment, which can cause the crisp "follicles" to soften and blur.
To keep your SMP looking its best for years to come, get into these simple habits:
- Use Sunscreen Daily: Make applying a high-SPF sunscreen (SPF 30+ or 50+) to your scalp a daily ritual, even on overcast days. A matte-finish sunscreen is a great option to avoid any unwanted shine.
- Moisturise Regularly: A hydrated scalp is a healthy scalp. Moisturising keeps the skin in top condition, which in turn keeps the pigment looking vibrant and prevents dryness from dulling the effect.
- Exfoliate Gently: Once a week, a very gentle exfoliation can help clear away dead skin cells and keep the look feeling fresh. Just be sure to avoid any harsh, abrasive scrubs.
- Plan for Touch-Ups: Even with the best care in the world, SMP will naturally lighten and soften over 3-6 years. A quick touch-up session is all it takes to restore that fresh, sharp definition and keep your look going strong.
Beyond these tips, simply maintaining overall scalp health with good cleansing and hydration will go a long way in preserving the quality of your treatment.
Breaking Down the Cost of a Scalp Tattoo in Australia
So, you’re thinking about a scalp tattoo for baldness and wondering what it's going to set you back. It’s one of the first questions everyone asks, and the answer isn't a simple, one-size-fits-all number. The final price for scalp micropigmentation (SMP) is always a personalised quote, calculated specifically for you.
It's less like buying something off the shelf and more like commissioning a bespoke piece of art for your scalp. This tailored approach means the price directly reflects the amount of work you actually need, ensuring it’s fair and accurate for your specific level of hair loss.
Key Factors That Influence the Price
The single biggest factor that shapes the cost is the extent of your hair loss. Here in Australia, practitioners often use the Norwood scale—a standard way to classify male pattern baldness—to gauge the size of the area needing treatment.
It makes sense, right? Someone with a slightly receding hairline (a Norwood 2) will need far less work than someone with significant hair loss across their crown and front (a Norwood 6 or 7).
A few other crucial elements will also play a part in the final quote:
- Practitioner Expertise: A highly experienced artist who has spent years perfecting their craft will naturally command a higher fee. You're paying for their skill, which is your best bet for getting a hyper-realistic result that lasts.
- Clinic Location: Just like with most services, location matters. You can expect costs in major hubs like Sydney or Melbourne to differ from those in Perth or Brisbane, simply due to different overheads.
- Job Complexity: Not all treatments are straightforward. For instance, carefully camouflaging prominent scars from an old hair transplant is a much more intricate job that demands more time and a specialised skill set, which will be reflected in the price.
What Is Included in a Typical Quote
A standard quote should cover your entire treatment journey from start to finish. This almost always includes your initial consultation, the 2-4 sessions needed to build up the perfect density, and any final touch-ups to get it just right.
In Melbourne, for example, a full SMP treatment often starts from around AUD 4,990. This figure typically covers all doctor's fees, the procedure itself, and any follow-up appointments. Pricing is heavily guided by the Norwood scale to estimate the time and coverage required, with potential extra costs for detailed scar camouflage work.
It's helpful to think of SMP as a long-term investment in your confidence, not just another expense. Unlike temporary fixes, a professionally done scalp tattoo is a lasting, low-maintenance solution to hair loss.
Understanding what goes into the pricing helps you see the real value you’re getting. For a more detailed breakdown tailored to the Australian market, check out this guide on scalp micropigmentation cost to get a clearer picture and help you plan.
Common Questions About Scalp Tattoos
Even with a good grasp of the process, it's completely normal to have a few lingering questions. Deciding on any cosmetic procedure is a big step, and you should feel 100% confident before you move forward.
To help you get that final piece of the puzzle, we've pulled together the questions we hear most often from people thinking about scalp micropigmentation. Let's get you the straightforward, honest answers you're looking for.
Does Getting a Scalp Tattoo Hurt?
This is usually the first thing people ask, and the answer is reassuring. Most clients describe the feeling as a mild discomfort, not real pain, putting it somewhere around a 2 to 4 out of 10 on the pain scale.
Honestly, it’s much less intense than getting a regular body tattoo. That’s because the special needles used for SMP are incredibly fine and only work on the very top layers of your skin. Plus, before anything starts, your practitioner will apply a potent numbing cream to your scalp, which takes the edge off significantly.
Some spots, like the temples or right along the front hairline, can be a little more sensitive, but the entire experience is well within the comfort zone for almost everyone.
Can I Still Grow My Hair After SMP?
Yes, absolutely. Scalp micropigmentation happens on the surface of the skin and has zero impact on your hair follicles below. It won’t stop them from growing hair now or in the future.
If you're getting SMP to add density to thinning hair, growing your hair out is exactly what you want to do. The pigment simply camouflages the scalp, making the hair you have look much thicker and fuller. For guys who go for the classic "shaved head" look, you’ll just need to keep your hair buzzed short to maintain that seamless blend between your real hair follicles and the pigment.
What if My Hair Turns Grey Later On?
This is a smart question, and it's something modern SMP is designed to handle perfectly. The secret lies in the specialised pigment that a skilled practitioner uses. It’s not a block of black ink like you’d see in a normal tattoo; it's a carbon-based, grey-scale pigment.
Your artist will create a custom-blended shade that matches the colour of your hair follicle right at the root, not the colour of the longer hair strand.
When your hair naturally starts to go grey, the SMP will still look right. The mix of your new grey follicles and your remaining darker ones will blend in perfectly with the pigmented dots. Your scalp tattoo will simply continue to look like a natural part of your scalp, aging right along with you.
How Do I Choose the Right Australian Clinic?
This is, without a doubt, the most important decision you'll make. The artist makes the result, plain and simple. Your homework should start with digging into their portfolio.
You need to see high-quality photos and videos of healed work—not just pictures taken right after a session. Look for examples on people with a similar skin tone and hair loss pattern to your own. Check out independent reviews on different sites to get a feel for what other clients have to say.
A truly professional Australian clinic will always start with a detailed consultation. They should listen to your goals, answer every question you have, and work with you to design a hairline that looks completely natural for your age and face shape. Finally, make sure you confirm their training, qualifications, and that the clinic follows all Australian health and safety regulations to the letter.
Ready to see what scalp micropigmentation could do for you? At My Transformation, we're here to help you find the best path forward in your hair loss journey.